
Bounty Bars {Video}
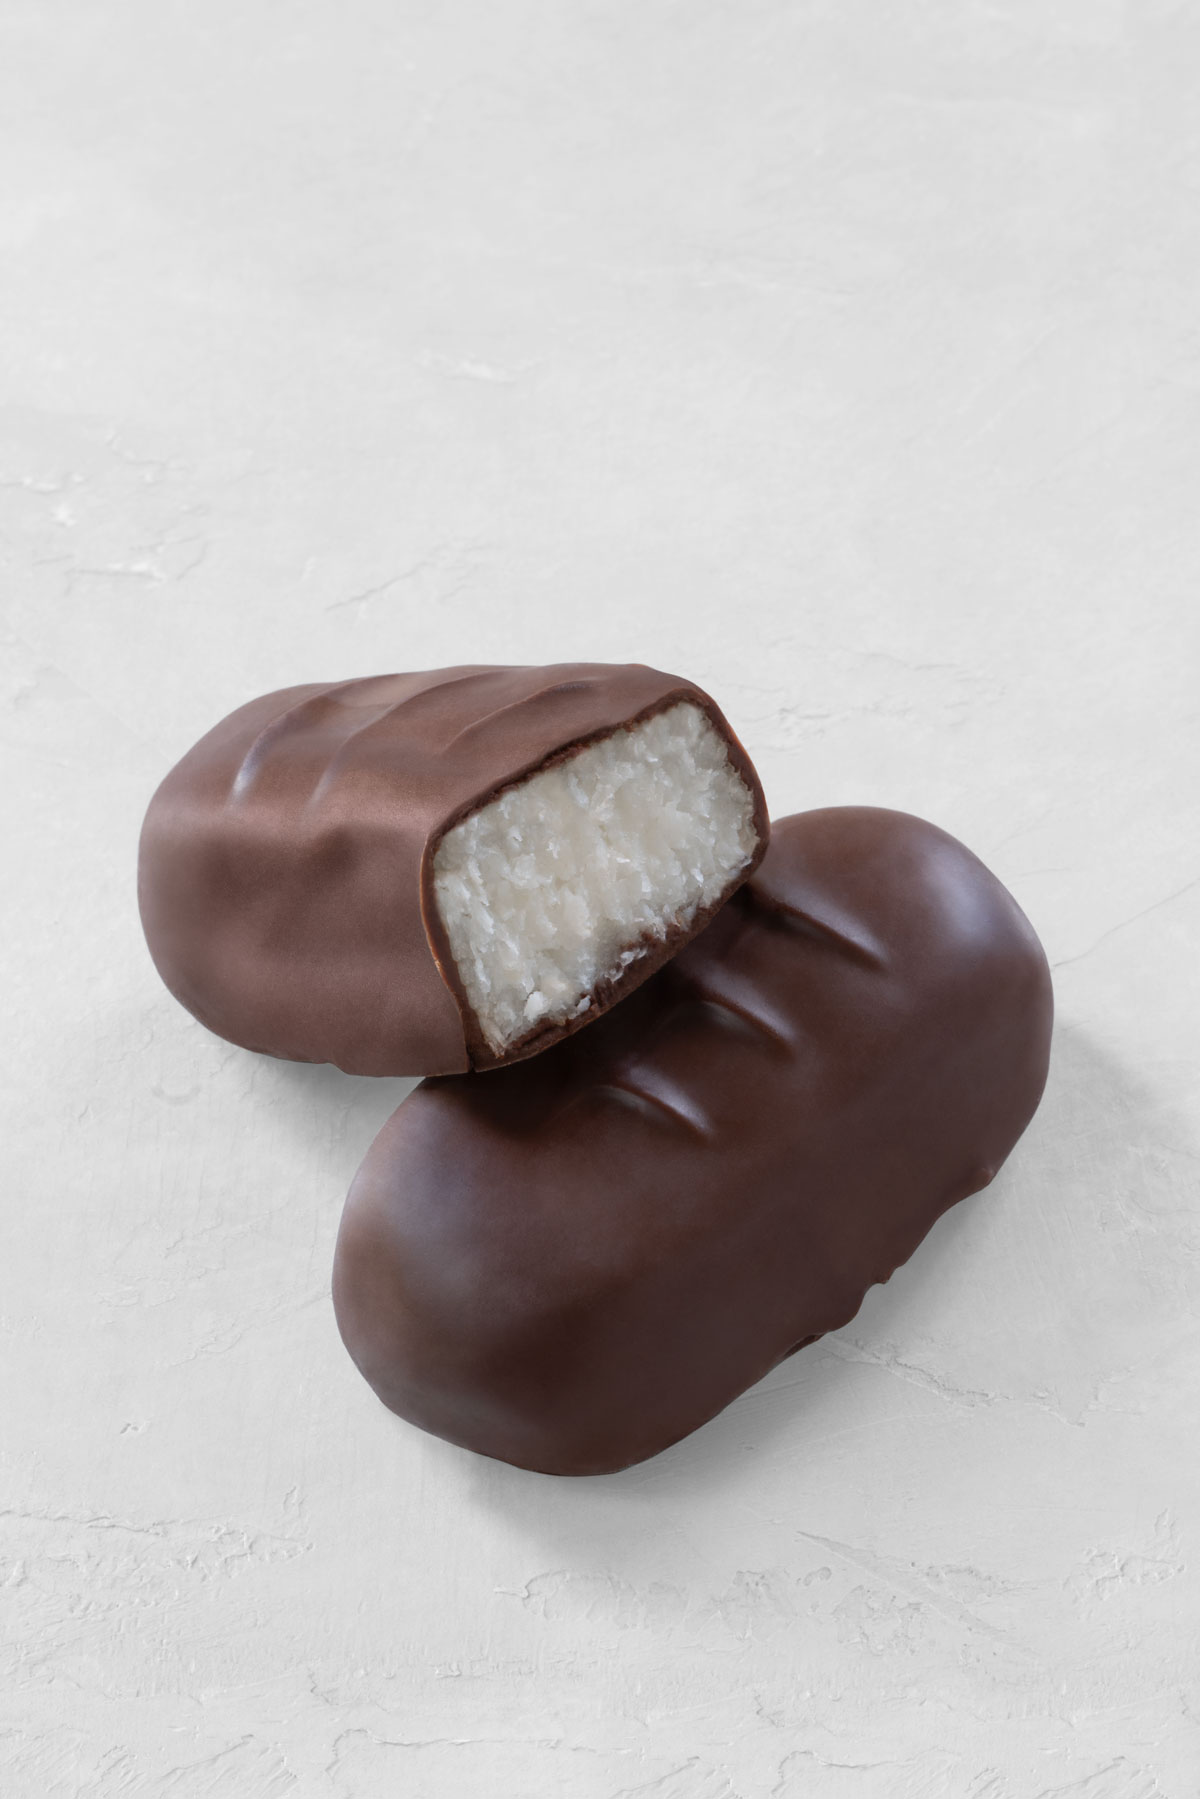
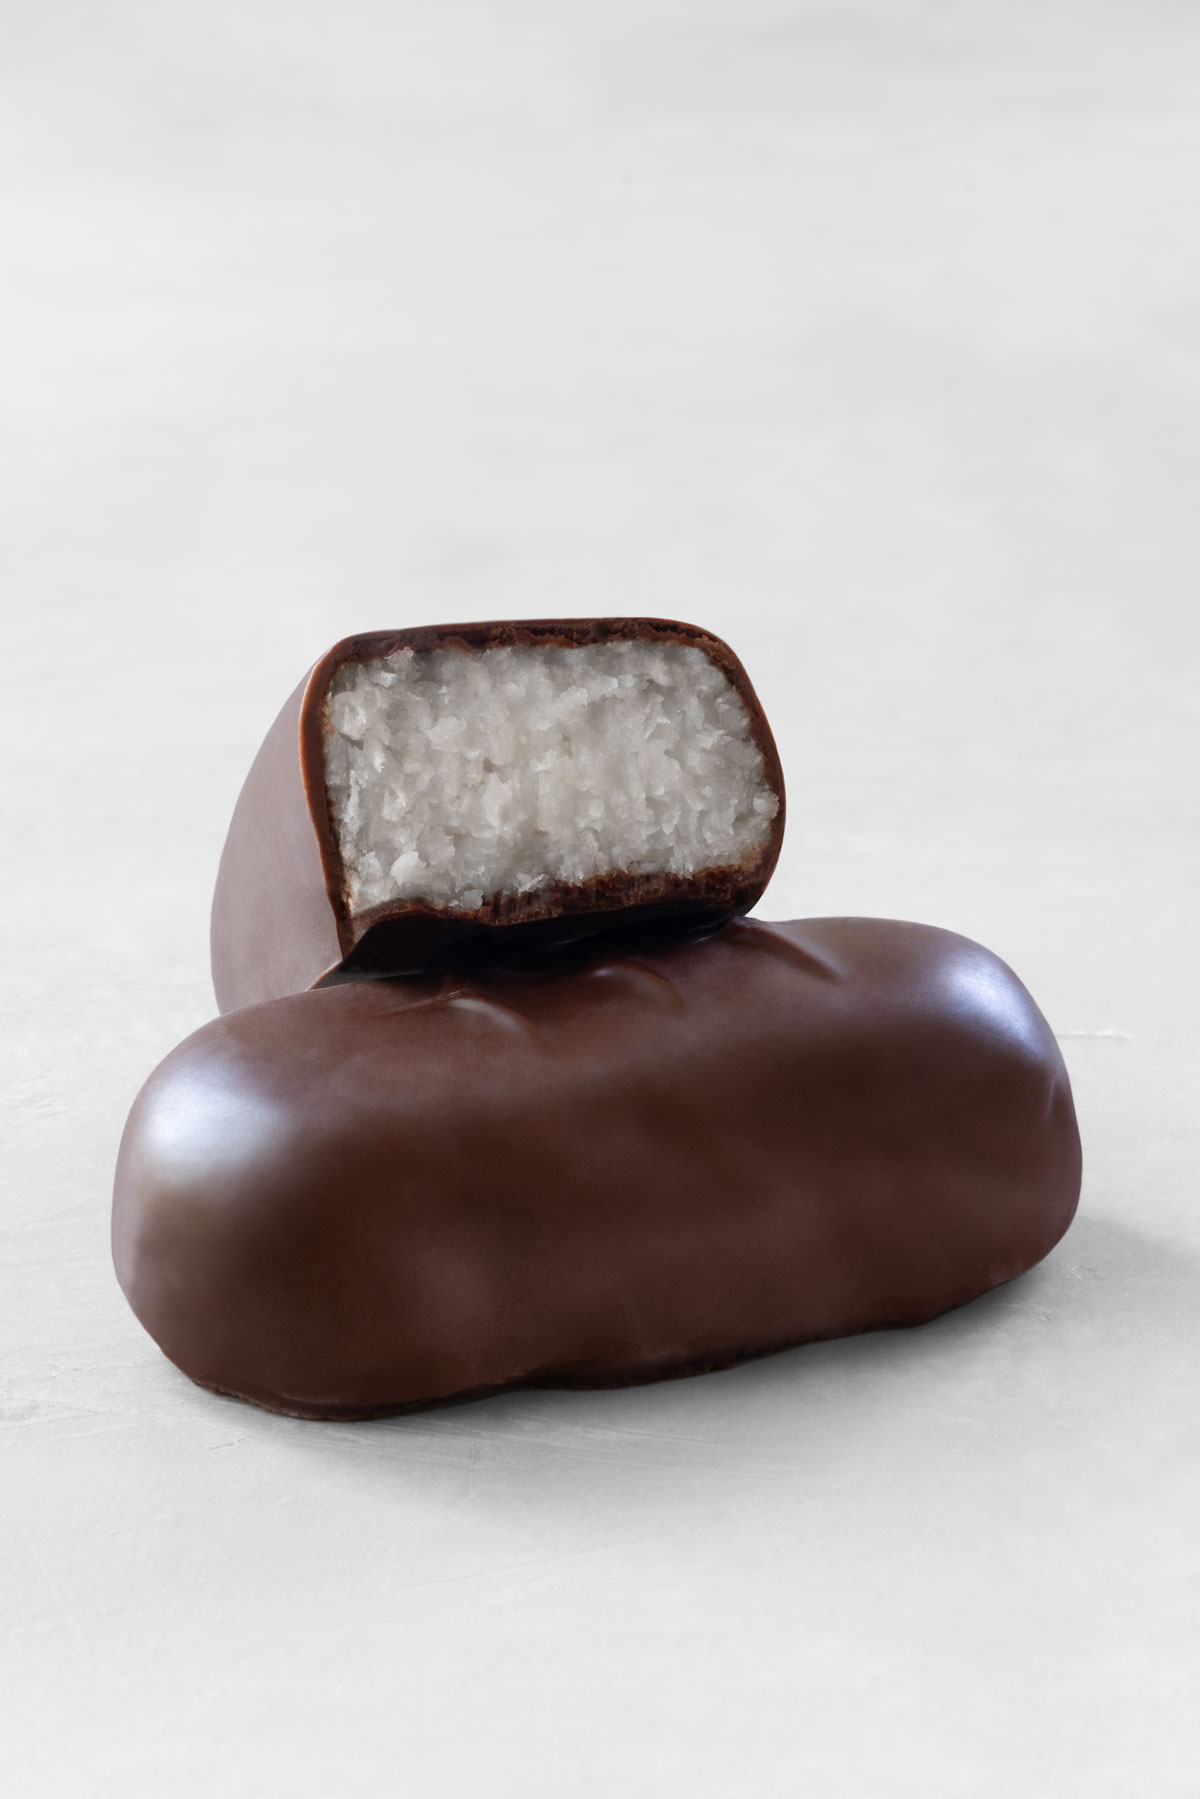
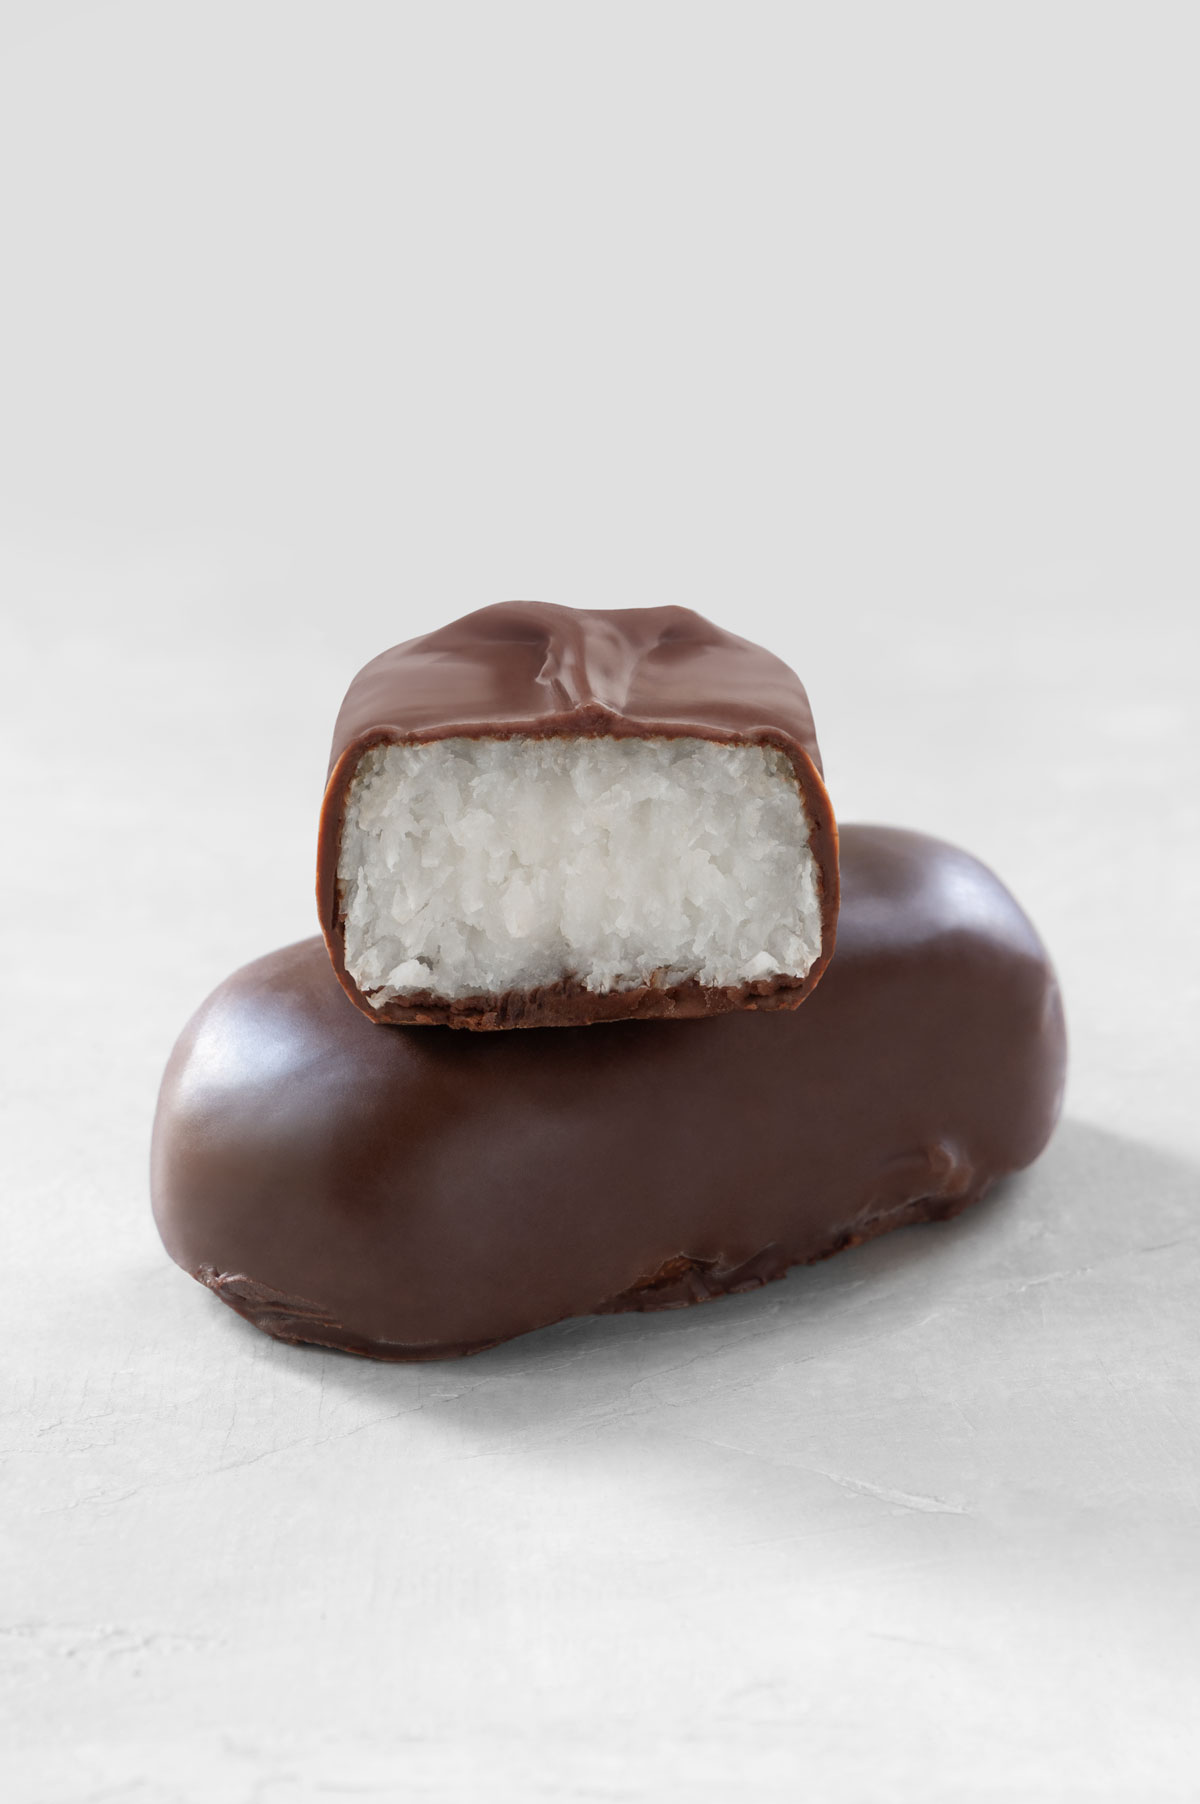
If you like the original Bounty bar, these copycat Bounty bars are a must. They have a sweet, creamy, and slightly chewy coconut filling covered by a thick layer of rich, decadent chocolate. These homemade Bounty bars seriously taste just like the original. The recipe is vegan (dairy-free, egg-free), grain-free (gluten-free), soy-free, nut-free, and refined sugar-free.
I love recreating popular treats from scratch. I mean, why go to the store when you can take all the credit for making everyone’s favorite branded treat? These raw Bounty bars are rich, coconut-y, and delicious. With an irresistible combination of coconut and chocolate, it’s no wonder that Bounty bars have been a classic confection for decades.
If I was honest, these homemade coconut-chocolate bars resemble Bounty bars in the way they look but Mounds in the way they taste.
While Bounty bars appear more popular, Mounds were the first coconut-filled chocolate bars. In 1920, Vincent Nitido came up with the idea to pair coconut and chocolate in candy bar form, and the Hershey Company eventually bought the product. Bounty bars, on the other hand, arrived on the candy scene in 1951 and were launched by Mars Incorporated.
The Bounty Dark and Mounds bars look and taste almost identical. However, Mounds have a softer and creamier coconut filling covered in a richer and less sweet chocolate (compared to Bounty bars).
Whether you’re a Bounty bar or a Mounds fan, I am sure you’ll love this recipe!
Tips for Making Bounty Bars
Ingredients
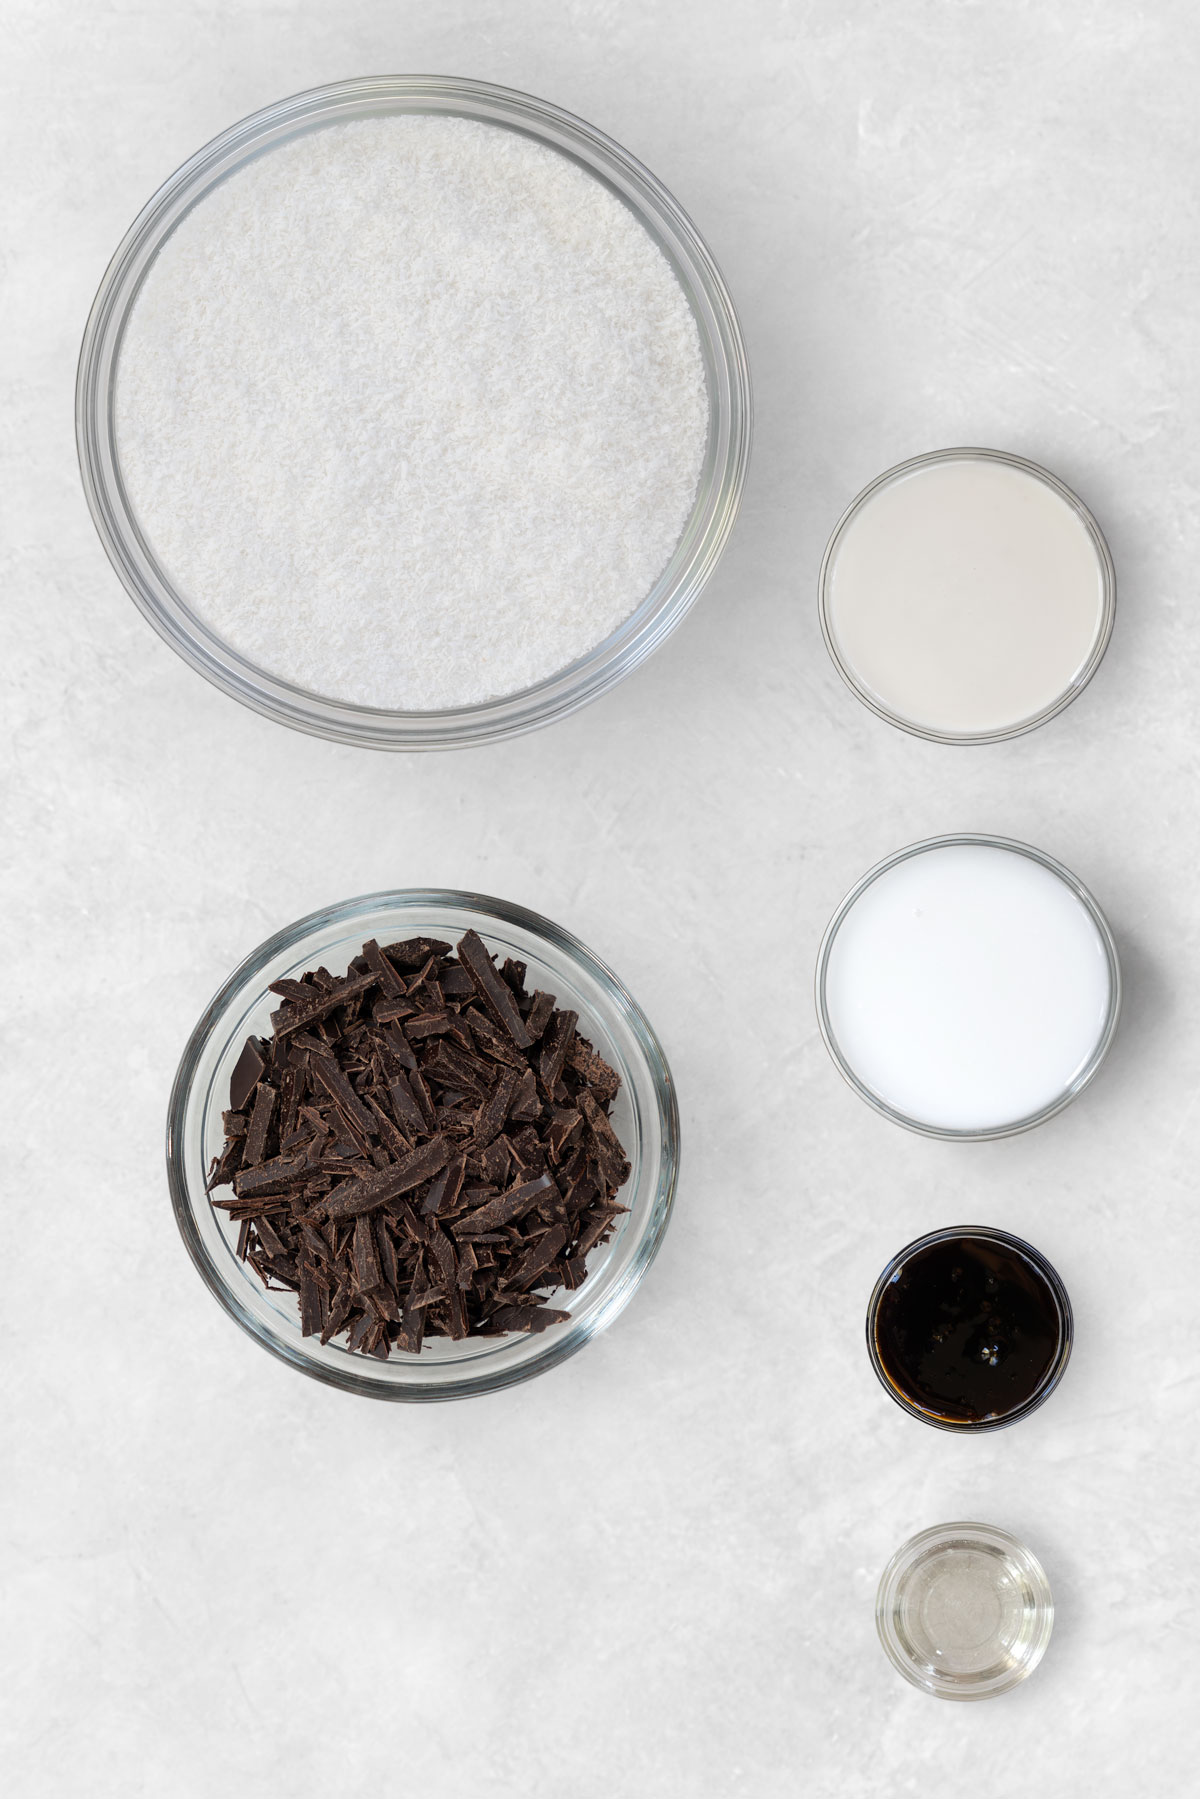
This raw version of the classic candy is made of simple, coconut-derived ingredients:
- Desiccated coconut: the main ingredient in these coconut bars is unsweetened dried coconut. I highly recommend desiccated (sometimes called macaroon) coconut because it’s the finest shredded, almost powdery, coconut. You could use shredded coconut if that’s all you can find, but the texture of the filling won’t be the same as the original Bounty bars and might crumble.
- Coconut butter: another essential ingredient in this recipe is coconut butter – puréed dehydrated pulp of a mature coconut. I use homemade coconut butter but feel free to use storebought. The common name for this product is coconut butter, but some brands also call it coconut manna, coconut meat puree, coconut cream concentrate, or whole coconut flesh purée.
- Coconut cream: as you would guess, coconut cream makes the Bounty bar filling smooth and creamy. If you use store-bought coconut cream, make sure to buy either coconut cream itself or use the cream that rises to the top of a can of chilled full-fat coconut milk.
- Coconut nectar: for an all-out coconut flavor, use coconut nectar – a syrup that looks like dark honey but has the consistency of brown rice syrup. The flavor is difficult to describe. It’s almost like a very light maple syrup with a hint of floral. Coconut nectar is quite pricey, so if you don’t have it on hand already, substitute it with maple syrup or brown rice syrup.
- Coconut oil: I don’t use virgin coconut oil in many recipes because it makes everything taste and smell like coconut, but it’s the perfect ingredient for Bounty bars. Besides enhancing the flavor, coconut oil helps the bars hold together.
- Chocolate: the original Bounty bars are enrobed in milk chocolate. However, both Bounty Dark and Mounds are covered in dark chocolate. I prefer dark chocolate, so that’s what I use.
How to Make Bounty Bars
These homemade Bounty bars are one of the easiest raw desserts you can make. Here’s how:
- Mix the Bounty bar filling ingredients. Add the desiccated coconut, coconut butter, coconut cream, coconut nectar, and coconut oil to a large bowl and mix until combined. The mixture should be moist and sticky when you press it between your fingers.
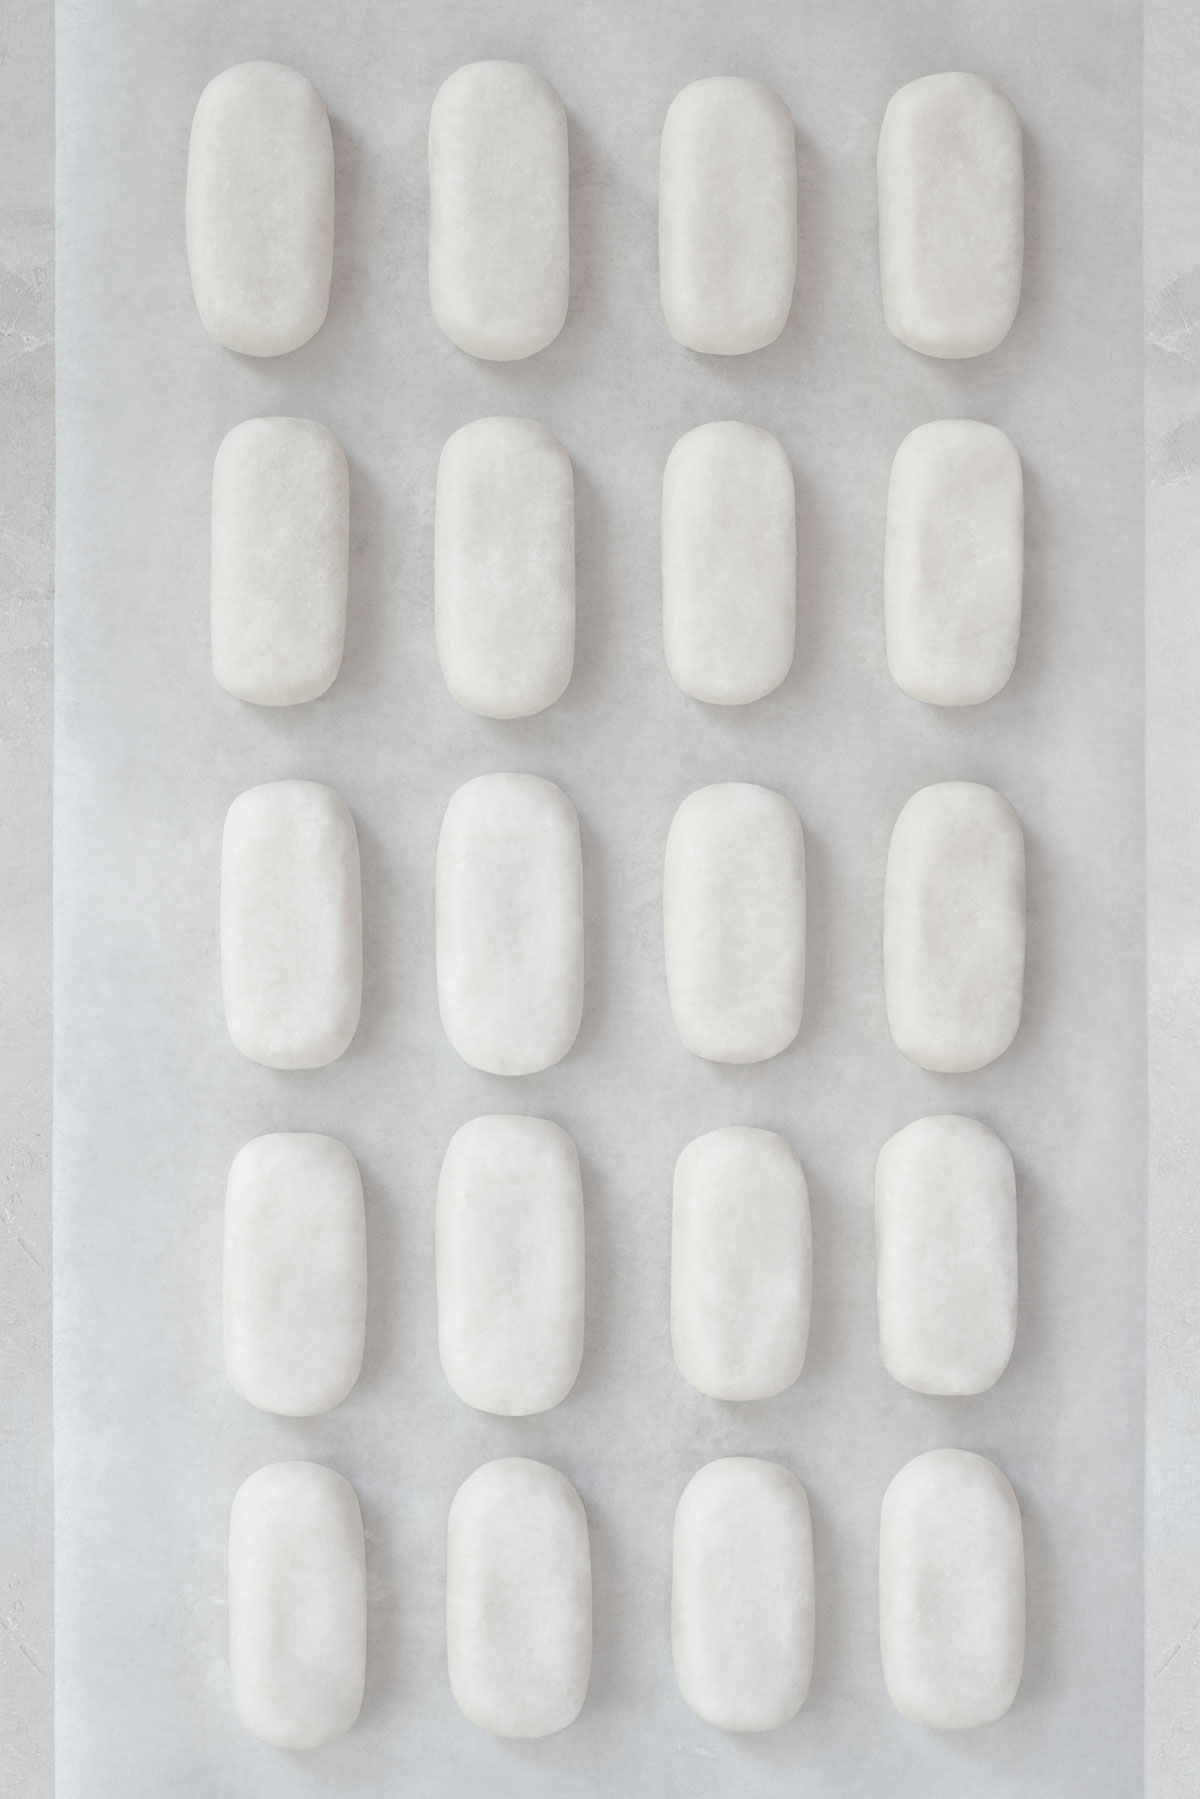
- Shape the mixture into bars. Using a 2-Tbsp./30-ml cookie scoop or a spoon, scoop out the mixture and gently roll it into a rounded rectangle. Place the bar onto a parchment paper-lined baking sheet. Repeat until all the mixture is used up.
- Freeze. Transfer the Bounty bars to the freezer to firm up, for about 10 minutes. It’s easier to work with the coconut bars once they have set.
- Melt the chocolate. Using a double boiler or a microwave, melt the chocolate. The chocolate should be smooth and glossy. I also like to temper the chocolate to get a shiny and snappy coating.
- Dip the bars in chocolate. Remove the bars from the freezer and allow them to come to room temperature for 5 minutes before dipping (to prevent shocking the chocolate). Place one coconut bar at a time into the liquid chocolate and turn it over a couple of times to coat. Lift the bar with a fork, allowing any excess chocolate to drip back into the bowl, then place the bar back onto a parchment paper-lined baking sheet.
- Chill. Return the Bounty bars to the refrigerator to set, for about 10 minutes.
How to Store Homemade Bounty Bars
- Refrigerating: transfer the Bounty bars to an airtight container and refrigerate them for up to 1 month. Bounty bars with tempered chocolate can be kept out at room temperature, ideally below 75°F/23.9°C, to enjoy. Homemade Bounty bars enrobed in untempered chocolate must be stored in the refrigerator; otherwise, the chocolate will soften/melt.
- Freezing: transfer the Bounty bars to an airtight container and freeze them for up to 3 months.
More Chocolate Candy Recipes
- Almond butter cups: somehow, chocolate and nut butter together are even more magnificent than they are when eaten solo. These almond butter cups have a wonderful contrast of crunchy yet smooth dark chocolate and rich, creamy almond butter filling.
- Snickers bars: coming soon!
Did you make this recipe? I would love to know how it turned out! Please let me know by leaving a review and rating below.
Bounty Bars
Ingredients
- 2 cups (160 g) unsweetened desiccated coconut
- 1/3 cup (80 ml) coconut butter
- 1/3 cup (80 ml) coconut cream*
- 2-3 Tbsp. (30-45 ml) coconut nectar
- 2 Tbsp. (30 ml) coconut oil, melted
- 1 cup (170 g) dark or semi-sweet chocolate, chopped
Instructions
- Mix the Bounty bar filling ingredients. Add the desiccated coconut, coconut butter, coconut cream, coconut nectar, and coconut oil to a large bowl and mix until well combined. The mixture should be moist and sticky when you press it between your fingers.
- Shape the mixture into bars. Using a 2-Tbsp./30-ml cookie scoop or a spoon, scoop out the mixture and roll it gently into a rounded rectangle. Place the bar onto a parchment paper-lined baking sheet. Repeat until all the mixture is used up.
- Freeze. Transfer the Bounty bars to the freezer to firm up, for about 10 minutes.
- Set up a double boiler. Add a few inches of water to a medium saucepan and top it with a stainless-steel bowl slightly larger than the circumference of the saucepan. The bowl should create a seal with the bottom saucepan to trap the steam produced by the hot water. Ensure the bottom of the bowl isn't touching the water – this would cause the chocolate to get too hot. Bring the water to a gentle simmer over medium-low heat. Once the water is hot, turn the heat to the lowest setting.
- Melt (and temper) the chocolate. Add ~ ⅔ of the chocolate to the stainless steel bowl set over the saucepan and melt the chocolate, stirring constantly, until the chocolate is completely smooth. Remove the bowl from the heat, add ⅓ of the remaining chocolate, and keep stirring until the chocolate is fully melted. The chocolate must be cooled to 88-89.6°F/31-32°C. If the chocolate contains any chunks at that temperature, gently warm it – ideally using a hair dryer – to melt the remaining chunks. If the chocolate is too warm, add more chopped chocolate, a little bit at a time, while stirring to cool the chocolate to the correct working temperature.
- Dip the bars in chocolate. Remove the bars from the freezer and allow them to come to room temperature for 5 minutes before dipping. Place one coconut bar at a time into the liquid chocolate and turn it over a couple of times to coat. Lift the bar with a fork, allowing any excess chocolate to drip back into the bowl, then place the bar back onto a parchment paper-lined baking sheet.
- Chill. Transfer the Bounty bars to the refrigerator to set, for about 10 minutes.
- Store. Leftover Bounty bars keep well in an airtight container in the refrigerator for up to 1 month. For longer-term storage, freeze in an airtight container for up to 3 months.
Dear Petra, I made your perfect bounty bars! They are so yummy!! They turned out to be better than a manufactured one!
My bounty aren’t so beautiful like your but I need some experince for the design))
I will make them again and again because I used to eat bounty in the past (when I ate refined sugar yet) and I loved them so much! I missed them and now I’m really happy that I can have a pleasure to taste them again so tasty and healthy as well!
Thank you so much for your recipe!!!
Lol, you’re like me 🙂 I used to eat Bounty in the past as well. So happy you enjoyed them ❤️
Dear Petra, could you kindly advice me how I can consume the water which has been left in the can after taking the coconut cream from it?
Thank you so much!!!
Hi Evgenia – for sure! I add it to my smoothies (you can freeze the water in an ice cube tray if you know you won’t be able to use it right away), make oatmeal with it for the kids in the morning, or even add it to a pancake batter. I have a friend (from India) and she thins her curries with it. I haven’t tried that yet 🙂 To be honest, a lot of people just dump it (because it’s not coconut water – it’s just water used to soak the coconut flesh in). But I don’t like to waste, so I usually find a way to use it 🙂
Thank you, Petra for your advice and for very useful ideas!
I made hot chocolate and added that water from coconut milk and the result was great! :))
Thank you so much, Evgenia!
Thank you for all these amazing recipes!!
These bounty bars are delicious!! They taste way better than any store bought bar❤️
Delicious
Wonderful! That makes me so happy to hear!